Setting up a local CVS in Netbeans 4.1 
- Introduction
- Steps required
- Initialising the local repository
- Registering and configuring local working directory for version control
- Adding files for version control
- Concluding remarks
Introduction
I created this tutorial, because I didn't find any tutorial about this subject online. I believe that being here, you probably know what CVS and Netbeans are and how they work, so I will concentrate on the steps required!Please note that you need to download and install CVS in order to do this, because the java CVS client that is included in Netbeans 4.1 does not support local CVS.
Steps required
There are some standard steps in order to setup a version control system in Netbeans. These are:- Registering the directory that version control will be applied.
- Adding the files and directories we want to keep a version history.
Initialising the local repository
This step is essential, because CVS manipulates some special files in a specific directory structure in order to maintain the version history.In order to do that, Netbeans has a menu item specifically for this. In order to find it choose Versioning | CVS | Init Local Repository...
This action will bring up the following window:

Here we need to point to the directory that we intend to set up to act as the local repository. This directory can be any directory of your local drives, or any network drives mapped in your system. In the next field we have to point to the cvs.exe that Netbeans will use to initialise the repository. You don't need to do that if you added cvs.exe in your path. If you didn't, then, by clicking browse, you can point where cvs.exe is. When you click OK, Netbeans will run CVS to initialise the directory for use as a local CVS repository. This might take from a few seconds to a couple of minutes, depending on your machine. When done, you will see the following message:

If you go and check the directory that you provided, you will find out that CVS created a sub-directory called CVSROOT, which contains a number of files.
Registering and configuring local working directory for version control
If you followed the previous step closely, you should now be ready to register a local directory, containing your work, to be version controlled! In Netbeans choose Versioning | Versioning Manager. This will bring up a window, the manager I presume, where we will register our directory.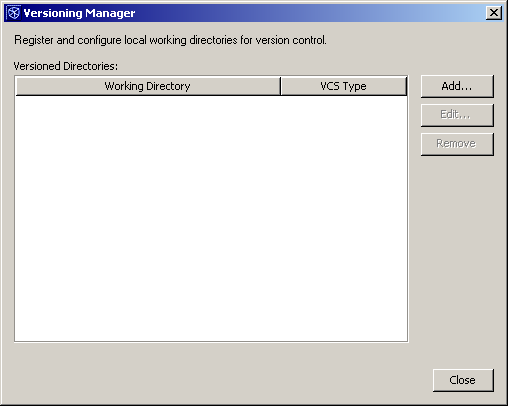
If you haven't setted up any other directories for version control before, your window will be empty, like the one demonstrated above. We have only two options, Add and Close, so I guess choosing Add is the wise choice at this point. This will bring up yet another window, where we need to input some information about the directory our work is in.
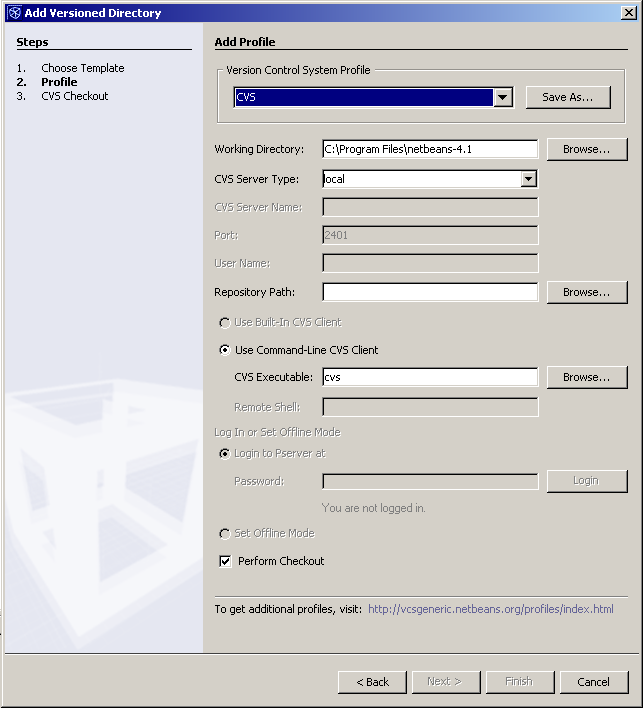
First of all, we select CVS as the Version Control System Profile, if it is not already selected. Then we give the full path to the directory that our source code resides. We select local as the CVS server type and finally we give the full path to the repository. The repository is the directory that we initialised in the previous step! Finally, make sure that the checkbox "Perform checkout" is checked. When you are done inserting all these details, press Next.
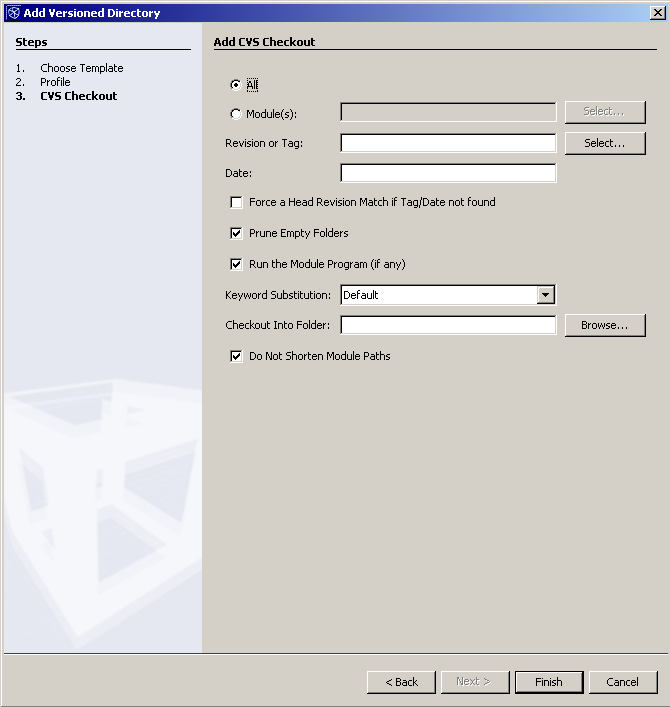
Now all we need to do is click finish! You don't have to input any of these details in this window.
Adding files for version control
We initialised our repository and then we registered the directory that has the files we want to keep versions of. The final step is to add the files or subdirectories that we want to be version controlled, because CVS does not automatically add the contents of the directory for versioning. This is done so that you can specify exactly which files and directories you want to keep track of. In order to do that, just right click on the file or package/directory in your projects explorer. You will find out that three new menu items are added in the menu. Out of these three, which I believe have self explanatory descriptions, CVS contains a submenu with all the actions that can be performed to the specific item. Out of this list, we select Add for these files and directories we want to include for version control.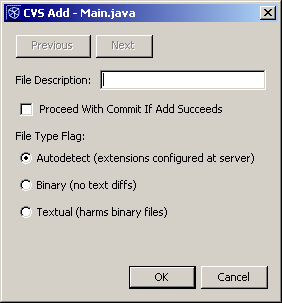
Here we are presented with the option to insert a description for the file that is inserted. On the contrary the window that appears if we are adding a directory is the following:
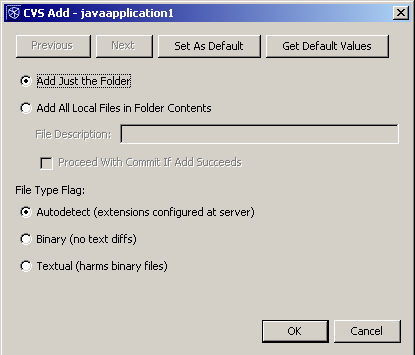
Please note that we have the option to just add the folder, or add its contents too. The first option corresponds to Add command of CVS, while the second to Import. Regarding the file type flag, Netbeans will use the extensions of the files to judge whether the file is text or binary. If a binary file is added to CVS as text, then the file becomes unusable.
Concluding remarks
You are now ready to use local CVS in Netbeans. Please don't forget that for each file or package that you create you have to add it to the repository before it can be version controlled.If you have any questions, please DO NOT email me. I will not be able to help you.
If you wish, you can leave your comments in the related blog entry
References
CVS DocumentationNetbeans website

